
If you play a classical or flamenco guitar with nylon strings, it’s important to learn how to string your guitar. Changing nylon guitar strings can seem intimidating or complex, but I assure you it’s not too difficult!
With a little patience and practice, you should be able to string your classical guitar in about 15-30 minutes.
There’s many other step-by-step and how-to guides out there for changing strings. However, some of them provide too many steps to easily remember. Not helpful! Others go into great detail, but don’t provide clear enough images or examples to understand the process thoroughly.
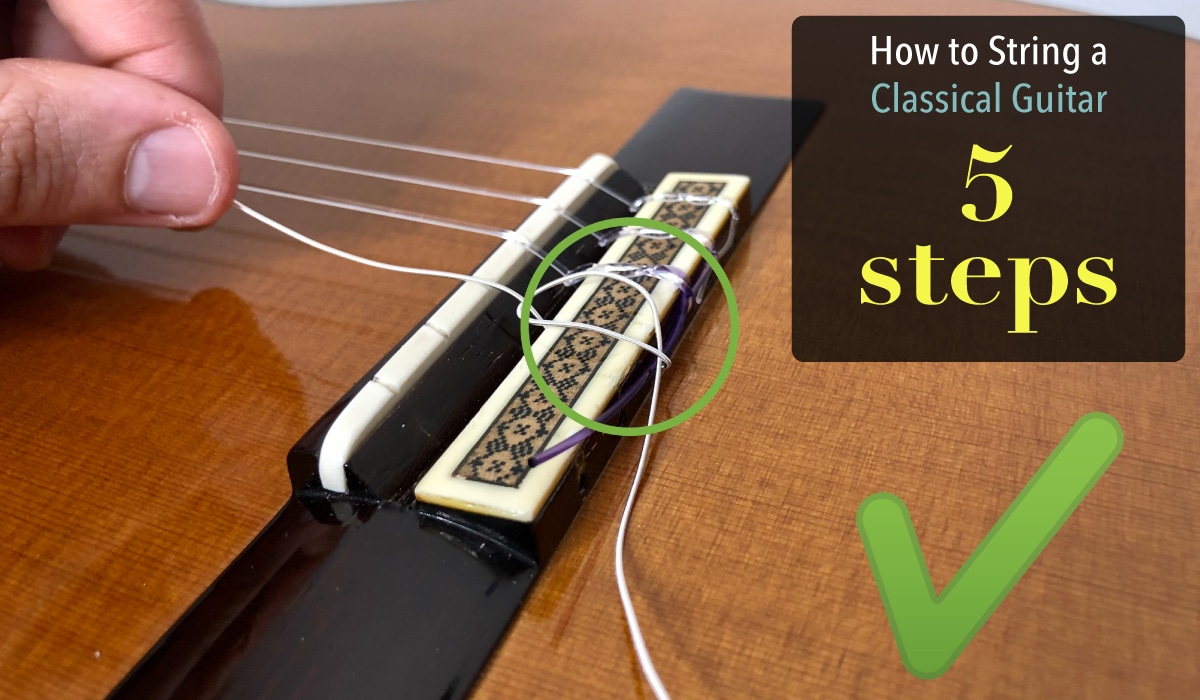
My goal here is to strike a balance of easy steps, and clear images. We’ll cover the basic things to know about changing classical guitar strings in a 5 easy step process.
Ultimately, after reading this guide you should feel more comfortable restringing your nylon string guitar! Feel free to review the mostly optional materials in the introduction, or skip straight to step 1.
Restringing your classical guitar
Introduction – Getting Started
1. Tune down and remove all the old strings
2. Tie and secure the nylon treble strings at the bridge
3. Secure the string to the tuner peg (same process for bass and treble)
4. Tie and secure the nylon bass strings at the bridge
5. Trim the excess string
Do you have any questions or comments about the guitar restringing process? If so, please feel free to comment on this post or contact me directly!
Introduction – Getting started
How do you know when to change guitar strings?
Here’s the top 5 ways you know it’s time to replace your guitar strings:
- Your guitar strings are more than 6 months old
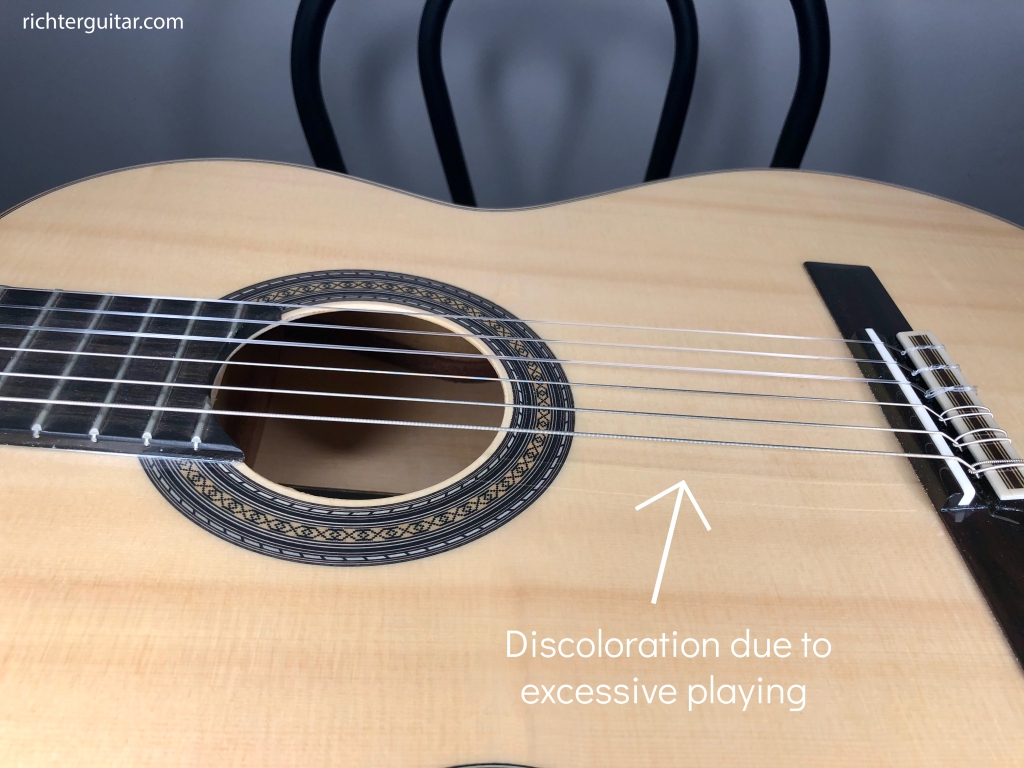
- The strings are discolored (dirty and not shiny)
- Your guitar tone is dull and doesn’t resonate long
- The strings won’t stay in tune
- Your guitar strings feel stiff or brittle
If you know that your guitar strings haven’t been changed in at least six months, then it’s definitely time to replace them. Due to tension, over time your strings will get stiff, brittle, and frail. This happens even if you don’t play your guitar at all!
Sometimes you can even hear that the strings are losing their vibrancy. If your tone sounds dull or the strings don’t vibrate for long, it’s time to get new ones.
One visual way you can tell it’s time to change your guitar strings is if you see that parts of the guitar strings have lost their shine. You can tell the difference by looking at the color of the strings on the first couple of frets compared to further up the neck past the twelfth fret (where the guitar is played less frequently).
Sometimes you can see this on areas where you strum or pluck the strings as well:
How often will you need to change your strings?
Here’s a breakdown of how often to change your guitar strings based on how much your practice:
- 3+ hours of practice per day: replace strings every month
- 1-2 hours of practice per day: replace strings every 2-3 months
- 1 hour or less practice per day: replace strings every 4 months.
Since I usually practice 3-6 hours per day, I typically replace my guitar strings every month.
If you play an hour or two daily, you probably only need to change your classical guitar strings once every 2-3 months.
What supplies do you need to change classical guitar strings?
Realistically, the only thing that’s required to change your guitar strings are new guitar strings!
But before jumping into the step by step string changing process, there’s a few household supplies you can use to improve the string changing process. There’s many preferences and opinions about the perfect string changing resources out there.
Personally, I don’t use anything too fancy! So here’s just a basic checklist of string changing supplies for you to consider.
New Classical Guitar Strings (Required)
It sounds obvious, but in order to string your classical guitar you’ll need new strings! The strings I like the most are: Savarez Creation Series (Mixed Tension), D’Addario EJ46 Hard Tension, and Augustine Regal Blues.


You can always start off with Normal tension to see if you like the feeling more. Regardless, you’ll need to have some new nylon guitar strings in hand before restringing your guitar!
You can check out my classical guitar strings shop for more great options.
Lastly, please keep in mind that steel string acoustic guitar strings should never be used on a classical guitar! Oftentimes steel strings won’t be the proper size, but more importantly if used they will actually damage the classical guitar itself.
Nail Clippers or Scissors (Optional, Recommended)
While optional, I strongly recommend you have a pair of nail clippers or small scissors handy for the guitar stringing process. You’ll want to use one of these tools to clip both ends of the guitar strings once they’re fully wrapped.
Because the angle of the excess guitar strings can be awkward to access especially at the bridge, having a small tool like nail clippers is very helpful. Small scissors like those used for trimming a mustache are also useful as long as the blades are sharp enough to cut through the bass strings.
Cleaning Materials – Cloth and Lemon Oil (Optional)
Although this is also optional, I recommend you have a soft cloth handy for cleaning the guitar fretboard and body. You’ll want to do this when you remove the old strings and before you put the new ones on. A simple microfiber cloth will do, or you can even use a soft rag or old sock!
Once the strings are removed, you can also apply lemon oil on the fretboard only. You’ll need a separate cleaning cloth if you decide to use it.
More details on the cleaning process are outlined below. Now let’s go through the classical guitar restringing process, step by step!
1. Tune down and remove all the old strings
The first step is to tune down each of the old guitar strings. Simply tune each string down until there’s almost no tension, and no distinct pitch is produced.

At this point, they’ll be loose enough for you to manually unwind with your fingers at the headstock and bridge.


Optional step: Clean your guitar
When the old strings are removed, you have the opportunity to clean dust and gunk off parts of the guitar body fretboard that’s usually blocked by the strings. It’s amazing how much dust and grime can accumulate here in even a short amount of time!
Although cleaning isn’t “required” for the guitar restringing process, it’s still a good idea and only takes a few seconds.

Dust above the bridge
For the body, the main area to clean with the cloth is the section right around the bridge.

Smudges on side of body
This is also a good time to clean other parts of the guitar body, which can get smudged up by your fingers or hands over time. A simple hot breath and wipe with your cleaning cloth should be all it takes!

Fingerboard and Fret Gunk
Another part of the guitar to clean once the strings are removed is the fretboard. Over time, finger dirt and grime can leave gunk on individual frets, usually surrounding the metal fret area.

Some people recommend using lemon oil to clean the fretboard, in which case you’ll also need a separate cleaning cloth.
If you use lemon oil, make sure none of it gets on the body of the guitar as this can damage the finish! Make sure the fretboard is not too oily. Let the lemon oil sit for at least 30 seconds to dry out some before putting the new strings on.
2. Tie and secure the nylon treble strings at the bridge
Step two is tying the high E treble string to the bridge. Once all the old strings are removed and the guitar is clean, it’s time to open your new pack of strings.
I like to start by putting on each treble string completely one by one (high E string, B string, and G string). Each string should be labeled by the individual wrappers or by tags or stickers.
Feed it through
Next, we’ll start by feeding the high E string through the first hole on the bridge. I usually push through 1.5-3 inches of excess string, which we’ll need for looping and tying.


Loop the string clockwise
Then, take the string tail and loop it to the right underneath the part of the string that’s above the bridge hole. When looping, you should be going in a clockwise direction if you’re facing the guitar.

As you pull the string tail through, make sure the it’s below the saddle (white part at the top the bridge with string divots).

Now you’re going to weave additional loops in the same direction, each one wrapping lower than the last one. This helps secure the nylon strings as they tighten.
For the E String, I recommend you perform two additional loops (three loops total) around the bridge portion of the string to secure it. For the B and G strings, just two loops total will be enough.
On the third loop of the E string, you’ll want to position the string on the underside of the bridge near the hole. The string is threaded through this way so it can be secured by the wrap of next string.

Pull the tail all the way through. Once you finish looping the E string, it should look similar to this:

Voila! This is how you wrap a nylon string on classical guitar! At this point you can move on to Step 3 to learn how to secure the high E string to the tuning peg. But for more info on how to safely secure the treble string tails, keep reading this section.
Securing the string tails
You’ll want to continue the same tying process above for the B and G strings. Just make sure that as you put more strings on, each string tail gets secured by the next string. The string tail needs to rest on top of the next string in order to be secured by it.

When done properly, your strings will be on securely and you’ll end up with an aesthetically pleasing design:

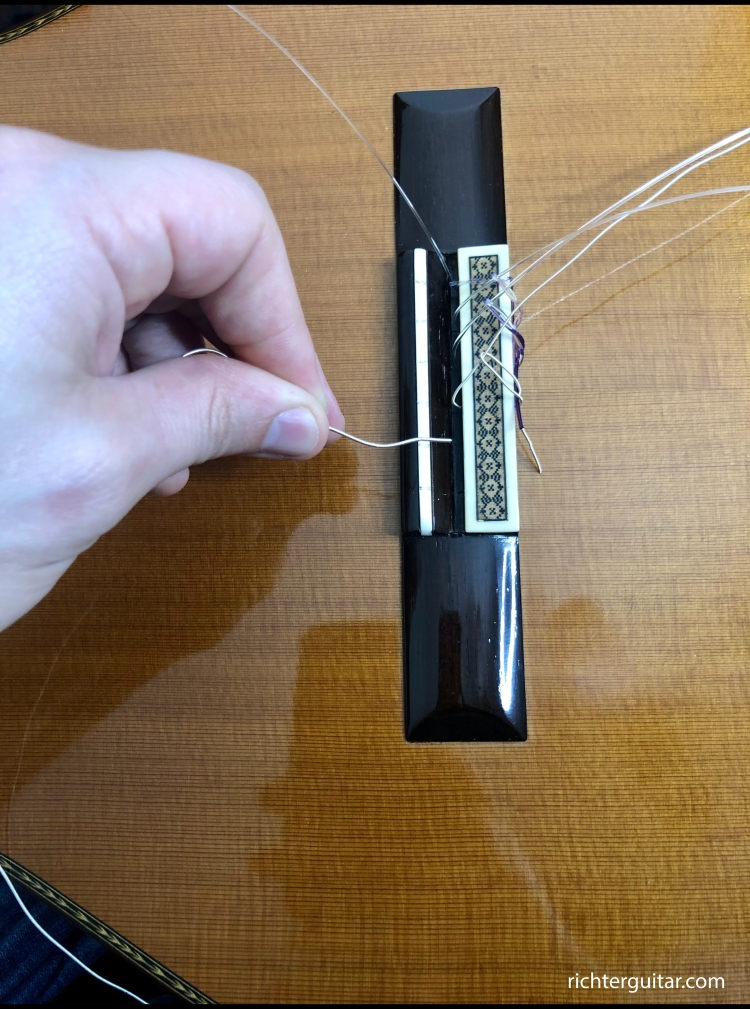
Beware the String Whip!
Why do we weave the nylon strings and tie them this way? Simply put, it helps secure the string as the tension increases during tuning. Tying the strings this way prevents what’s known as a “string whip” or a “string ding“.
String whips are most common on the high E string, which is why it’s a good idea to wrap it a third time. You can see the unsightly results of a “string whip” from a B string here:

3. Secure the string to the tuner peg (same process for bass and treble)
Once you’ve secured the high E string at the bridge, take the string and feed it through the hole of the first tuning peg on the head of the guitar. Here’s a tip: if the hole on the peg seems inaccessible, you can always turn the peg to make sure the hole is facing the right direction.

From here you have two options to further secure the string: you can feed it back through the hole a second time, or you can thread the string through a loop you create.
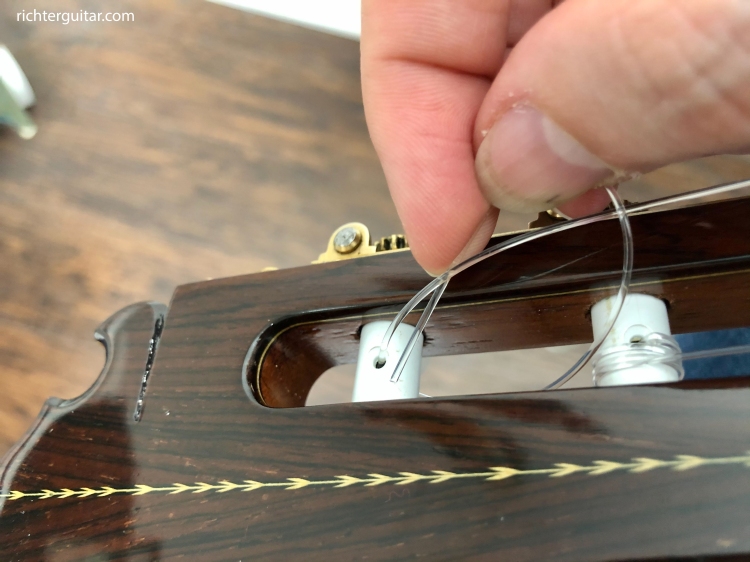
Option 1: Feeding through the peg a second time (The Double Loop Method)
The photo below shows what it looks like when you feed the string through the peg hole a second time. I find this to be the most effective method for securing the string to the tuner peg. That’s why I call this “The Double Loop Method”.
To do this, wrap the string around the peg with your fingers and pull it towards you through the space between the head and the peg. Then, stick the string end back through the same side of the hole you first put it through.

The end result should look something like this:

Before you start tuning the string, always double check that the string is secured in the correct slot on the nut as seen above.
Please note that not every guitar tuner peg hole is wide enough to fit the string through a second time, this is especially true for the bass strings. In fact, you probably won’t be able to use this double tying method at all on the thick low E string (putting it through once is enough).
In the words or Parliment Funkadelic “If it don’t fit, don’t force it!” Instead, you should go with the threading option described below.
Option 2: Thread the string through a loop
The other popular method for securing a classical guitar string to a tuning peg is to thread it through a loop you create. You should feed the string all the way through, and make sure it’s relatively tight.


Tune the string
Once the string is secured to the tuning peg, I recommend you tune the string to its proper pitch. Each time you put on a new string, go ahead and also check the tuning for the other strings you’ve already put on. Tuning the strings as you put them on has two advantages.
First, tightening the string immediately ensures that you’ve got enough string slack at the head and bridge. If not, you might need undo the string wrapping at the top and bottom and readjust it.
Second, tuning the strings one by one as you put them on helps the string adjust to the tension quicker. Think about it: by the time you’ve put on the sixth string (low E), you’ve already tuned the high E string at least six times!
4. Tie and secure the nylon bass strings at the bridge
The process for securing the nylon bass strings at the bridge is similar to the treble strings, but even easier! Rather than looping the string multiple times, you’re just going to loop the string clockwise one time.
Some people like to wrap the bass strings counterclockwise so that all the ends are tucked in. Personally, I just go clockwise for all strings and trim the edge of the 6th string once it’s finalized.

Don’t scratch up your bridge
Why do you only need to loop the classical guitar bass string once whereas the treble strings needed multiple loops?
One reason is because the nylon material for the G, B, and high E strings is slicker, causing it to slip or slide more easily.
The second reason is that as you tune the bass strings, multiple loops could end up scratching the bridge. Some bridges have an intricate design, it would be a shame for it to get torn up!
The single loop bass string placement should wrap on the underside of the bridge, not over it:


Once you’ve fed the bass string through the peg head at the top, you might want to hold the bass string lightly in place with your finger while you tune it. A little movement is expected and perfectly fine.
Holding your finger on the bottom loop like this ensures that the end of the string doesn’t slip through or creep up on the bridge. Just be careful not to pinch yourself!

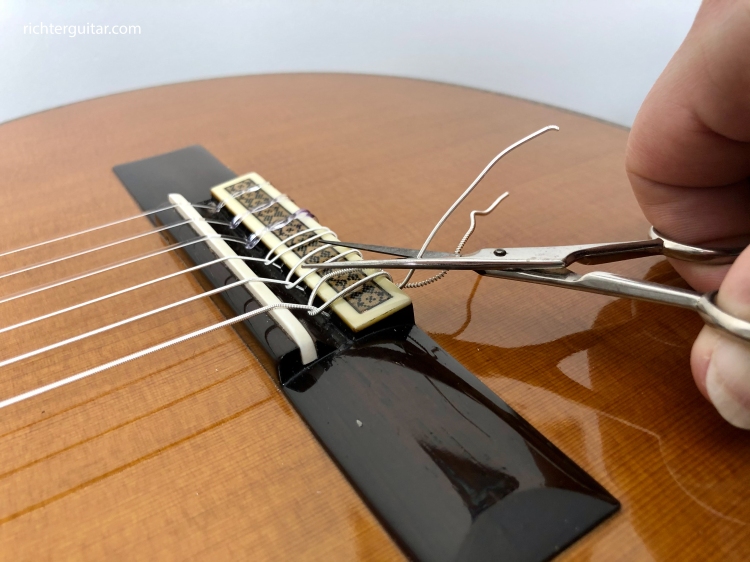
5. Trim the excess string
Now for the final step. You’ve gotten all the strings on the guitar, so it’s time to tidy up! Using nail clippers or scissors, you can trim some of the excess string both at the bridge and at the tuning peg.
Please note: if there’s too much excess string at the bridge, you might need to clip them during the restringing process.
Buzzkill
Beyond just being aesthetically pleasing, why is trimming the excess guitar string important? If the strings are too long, they can sometimes cause a buzz!
When playing guitar, the vibrations can cause the excess string to rattle against the body of the guitar below the bridge. This causes a scratchy, almost percussive buzzing sound–an unpleasant one!
The other way buzzing can occur is if the excess string is wrapped around within the space of the tuning peg. This buzz is more subtle, but happens pretty often.
After tuning, it’s always a good idea to check and make sure the string hasn’t wrapped at a weird angle that’s preventing it from being free.
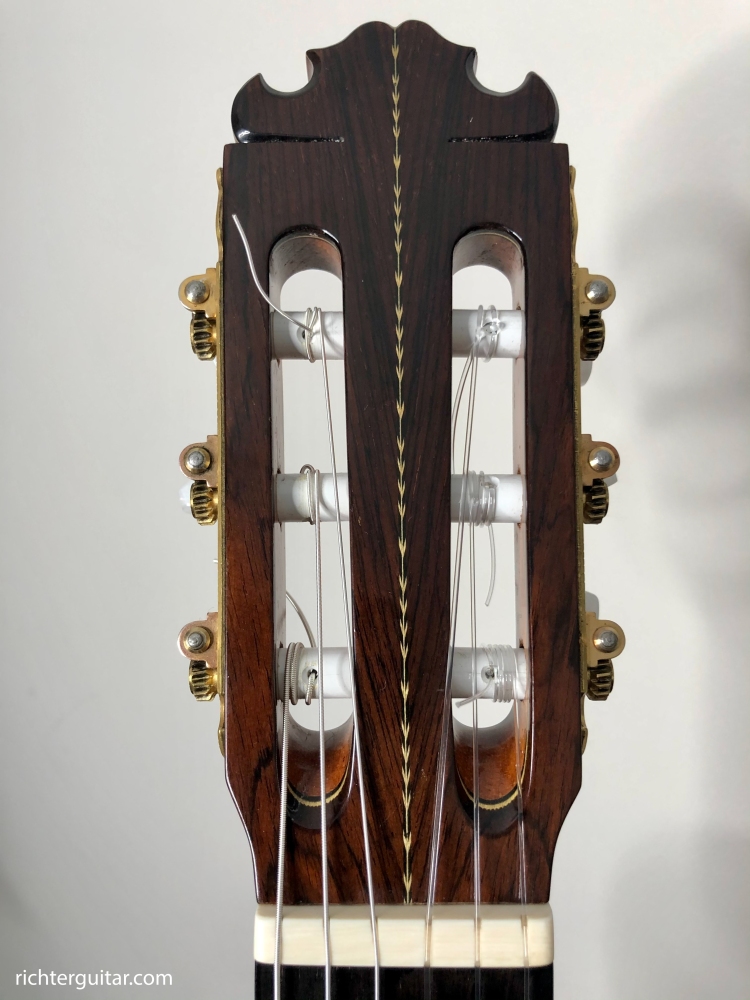
Once your strings have been trimmed, your finished product should look similar to this:


Conclusion
Congratulations, you’ve now learned how to change your classical guitar strings! If this process took a long time or was frustrating, don’t worry–I promise it gets easier with practice. In fact, once you get the hang of it you might find that changing strings is actually pretty fun!
Keep it clean
But if you’re like most people, you probably want your strings to last as long as possible. So what’s the best thing you can do to help your guitar strings last longer? Always wash your hands thoroughly before playing!
Playing guitar with clean hands will prevent the string coating from getting gunky or losing it’s shine. This also prevents the fretboard from getting dirty, which is another cause for strings losing their vibrancy. Lastly, always keep a soft cloth nearby or in your guitar case for quick cleaning access (both for the body and for the strings).
I hope you found this guide useful. Please let me know your thoughts and feedback in the comments or contact me directly! Thanks for reading, and remember to come back and review this article any time!
Nice!
Sent from my iPhone
>
Thank you! This one took a LONG time, hopefully it’s clear! Video coming soon!
Thanks; bought the strings, got the lemon oil ready… let you know how I do!
Thank you. I have been doing something close to this for over forty years, yet I applaud your attention to detail. If only I had read this when I was an eight year old, it would have saved me a lot t of bother. But, of course, there was no internet then! Much thanks, my good friend. I wish you lots of happy and fulfilling playing.
Thank you for your informative article.
I am an experienced steel-string guitarist about to get my first nylon-string guitar.
When I string my steel-string guitars, I always make the first wrap above the hole and the subsequent wraps (at least three) below going from the hole downward.
With the convex bevel on most steel-string tuners, this creates a pressure between the winds and upon the string coming through the hole that prevents slippage and keeps the guitar in tune.
I realize that most classical guitar tuners do not have this bevel, but I would think that using a similar winding technique on slotted head tuners would also reduce slippage and create a neater wind.
However I noticed in some of your pictures and on other sites that the winds on the tuners are apparently random in direction, sometimes creating a sharper angle at the nut.
I wonder if you could comment on the direction of the wind on the tuning posts and whether one should run the string end under the wrap to reduce slippage.
Hi Phil, thanks for reading and for your comment! My go-to method for preventing slippage on nylon string guitars is the Double-Loop method described above. I feed the string through the hole, wrap it around once, then feed the string through the hole a second time from the same entry point. I find that this secures the string to the peg extremely well. However, I’m not sure if this is recommended for steel string acoustic guitars.
I’ve seen some nylon string players perform the subsequent wraps as you’ve described and it seems to work fine for them. The only downside I’ve come across with elaborate wrapping is that the excess string can sometimes rub together and cause some buzzing.
In terms of winding, I always turn the tuner counter-clockwise to tighten the strings. As for whether the excess string wrapping is on the left or right side of the string, that depends on the guitar and peg slot placement. On the guitar I play currently, the bass E string runs to the left side of the wrapping, the A and D strings run on the right side, the G and B strings run on the left side, and the high E string runs on the right. Ultimately, if the guitar is well made I like to just trust the natural direction of the wind!
Hope this answers your question, thanks again for your insights!
I’m a guitar neophyte and appreciate all I’ve been learning from experts. So many issues and questions have been answered.
Thanks for reading, and for your comment Bill, I’m so glad you found this article useful!
With your article I’m ready to string my vintage parlor previously done by my luthier
After his refurbishment
I have recently suffered a string whip and was wondering if I should get it filled or fixed but I’ve seen bad results from this fix. The wood turns yellow underneath.
Hi Jay, thanks for your comment! Sorry to hear about the string whip, that sucks. From my understanding, while it’s possible to improve the appearance slightly, it’s almost impossible to completely mask it. You can send photos to some reputable luthiers to see if they think they can help, but generally speaking there will always be a blemish there. It’s happened to me multiple times in the past, so I feel your pain! In terms of preventing future string dings, try wrapping all of the treble strings three times at the bridge if you’re not doing so already. I find that provides a lot of extra security and stability during the tune up phase.
Fantastic article. Thank you very much. Regarding string whip, that happened to me once. My solution to try and avoid that is to take the cardboard enclosure that most gift cards come in and tape it below bottom of the bridge until I’m done changing strings. It’s saved me from that string whip indentation a couple of times over the years.